Lesson 2: Core Workflows
In this lesson in Kisi Academy, learn the baseline workflows for managing users, credentials, access and devices in the Kisi dashboard.
Reading Time: 12 min
Share this lesson
Core workflows refer to the tasks routinely performed in your Kisi account. Before implementing Kisi, it is important to understand and decide how your organization will handle these tasks.
Ultimately, you will want to make these workflows as easy or, ideally, as automated as possible. Additionally, you will want to keep track of who is able to perform which workflows and understand how to audit workflows.
Topic 1: Provisioning access
Kisi allows for user access to be shared or revoked through several methods including the following:
- Manual provisioning: Adding a permanent user manually
- Temporary keys: Adding a time-based access right
- CRM based provisioning: Avoid manual work and automate processes of adding users to groups.
- SCIM based provisioning: Fully manage users and their permissions in Kisi from SCIM.
- API based provisioning: Customize your provisioning workflows with Kisi’s open API
Let’s take a look at these methods in more detail:
Manual provisioning
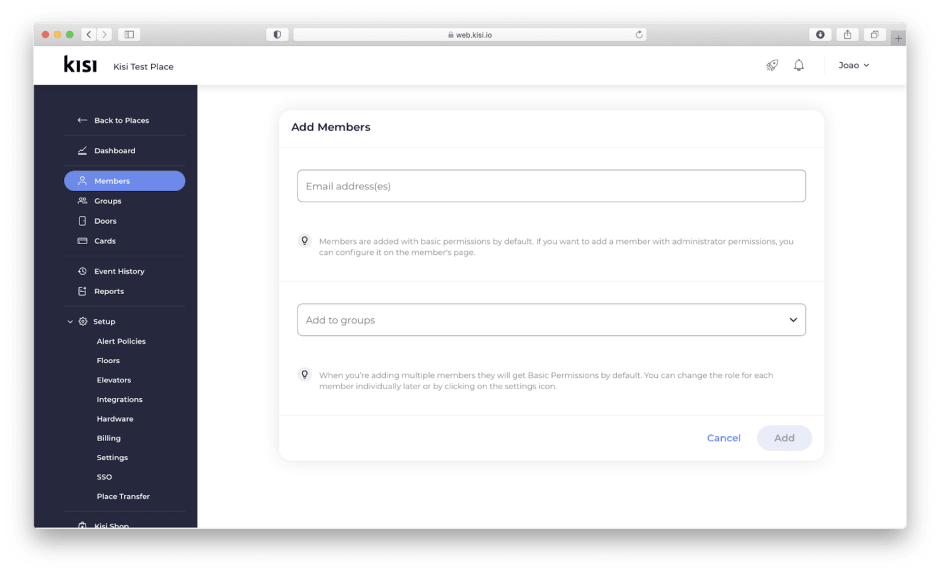
This is the most intuitive way to share access with users. Manual sharing allows users access to be provisioned by adding the email address of an end-user directly in the Kisi dashboard. Users can be assigned to a pre-defined team or group with a pre-configured set of access rights defined by you. Users added via manual sharing will receive an immediate email invitation from Kisi with instructions on how to create their Kisi account and access their credentials.
Temporary keys
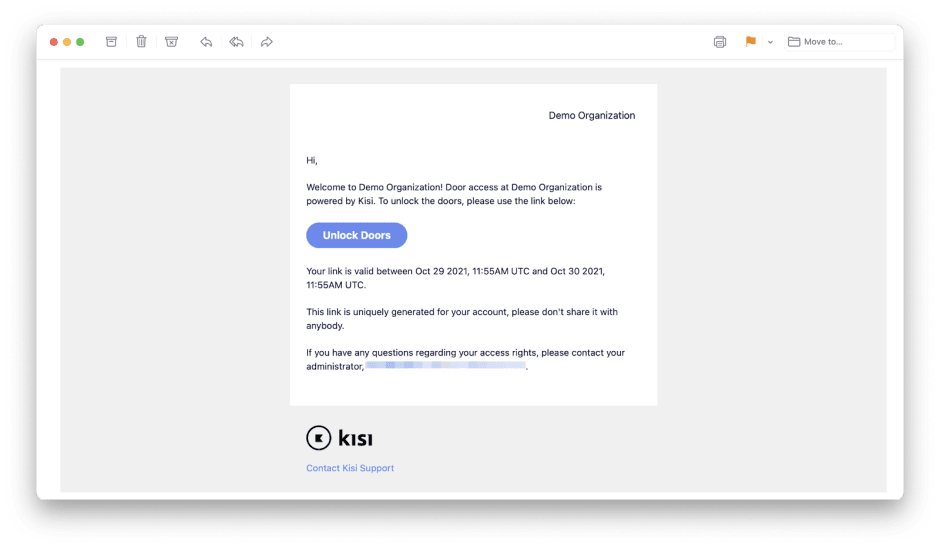
Access Links, also known as temporary keys, allow users to access doors in your organization without having to sign up for a Kisi account or downloading the mobile app. When access is shared using an access link, the authorized user will be able to perform unlocks directly from the emailed URL. Access links can be valid for an hour, a day, a month, or indefinitely based on the validity date option set.
Access Links have a lower security level than app or card access. An Access Link can be used by anyone that has the link. Reader and geofence restrictions do not apply to Access Links.
CRM-based provisioning
With CRM-based provisioning, you can automate access sharing by connecting Kisi to your member CRM software or third-party directory. CRM-based provisioning works by pushing the user profile into Kisi then automatically mapping the users' access permissions as assigned from the CRM or directory defined group.
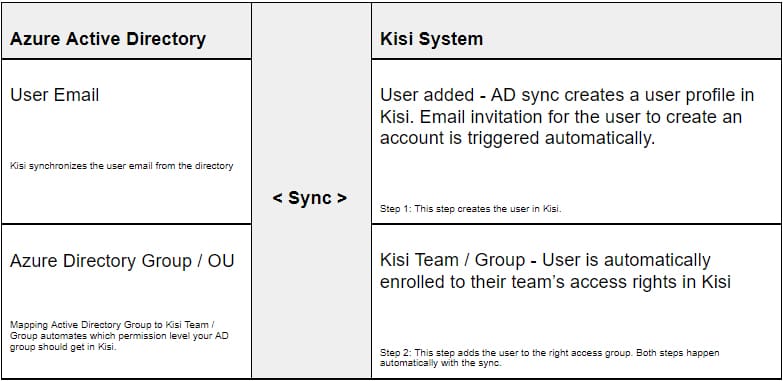
In the example, a user with a verified email exists in the 3rd party directory (Azure AD in this case) and is assigned to a group or organizational unit in that directory. As a part of the setup, the group or organizational unit in the directory will be mapped to a corresponding Kisi Team or Group. Whenever a new user is added to the directory they are automatically added as a user in Kisi and assigned to their predefined Team or Group.
When you change a user's provisions, removing the user from your Active Directory group, this will trigger for the user to be removed from the Kisi Team or Group they were assigned. This will not remove the user from the Kisi system as the user account belongs to the user who created it. To fully remove a user after provisioning it is recommended that SCIM based provisioning be leveraged (see next section).
SCIM-based provisioning
With SCIM-based provisioning, administrators have greater control over the addition and removal of users from the Kisi system. Currently, Kisi and the following vendors support SCIM integration: Okta, Azure, OneLogin, and Jumpcloud. As SCIM-based provisioning is rather technical, we’ll refer to our HelpSpace setup guide section for each vendor.
API-based provisioning
API-based provisioning is useful for creating integrations not currently supported by Kisi or the vendor. With API provisioning, you are able to build a custom integration between Kisi and your target directory. To learn more about Kisi API, check out our product documentation on adding users.
Topic 2: Enrolling credentials
Administrators are able to leverage various credential types that Kisi supports for enrollment, including:
- Mobile credentials
- Kisi credentials
- Legacy credentials
- Contractor / vendor credentials
- Time-based unlock links
Detailed technical information on credentials can be referenced in our product documentation.
Before enrolling credentials it is important to consider the following:
- Define which type of credentials each access group will receive.
- Determine your organization's default credential type and communicate this to your organization. If you have a “mobile credential” default policy, users will by default receive the mobile credential, unless they ask to enroll another credential.
- Define the credential change request and replacement process: How should your organization members get in touch with you to change credentials or request replacement credentials?
Enrolling mobile credentials
Enrolling iOS or Android mobile credentials in Kisi can be quickly accomplished by adding a confirmed email address and selecting the right Team / Group access level in Kisi.
Kisi sends an automated email upon enrollment, letting the user know that access to your organization has been shared with them. Additionally, they receive instructions to self-service onboard and download the iOS or Android App.
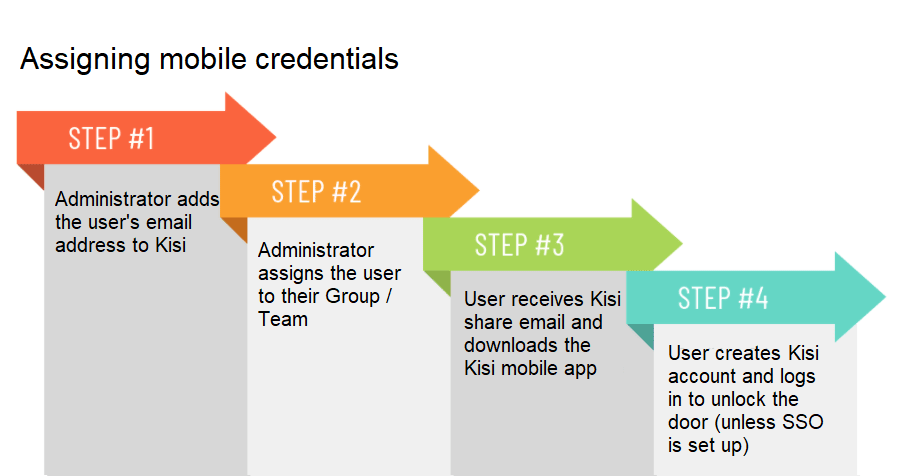
As a best practice, it is recommended that a user's email address be set up prior to enrollment to avoid being marked as inactive or blacklisted by Kisi.
A popular use-case for manual sharing is adding temporary, time-based access links for visitors which could be time-based or also shared as a link.
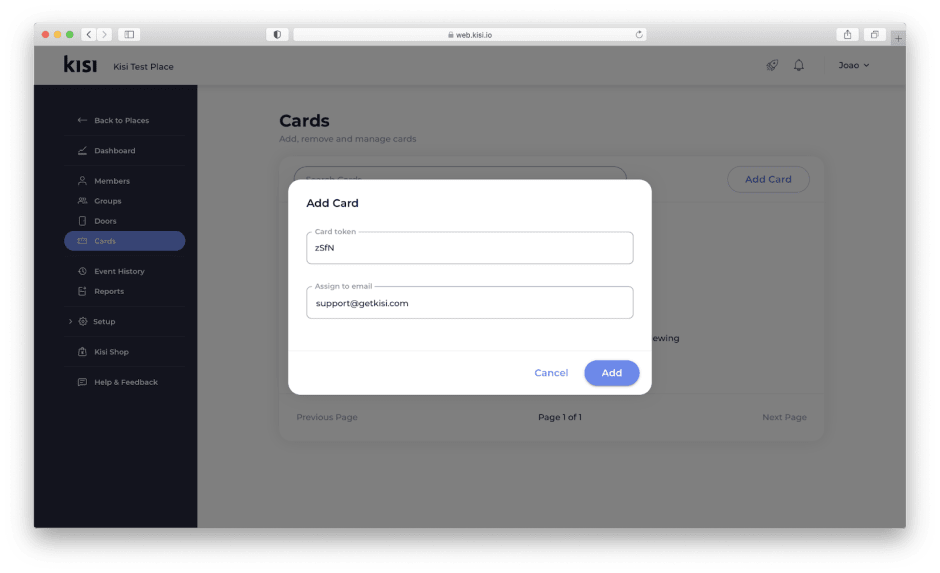
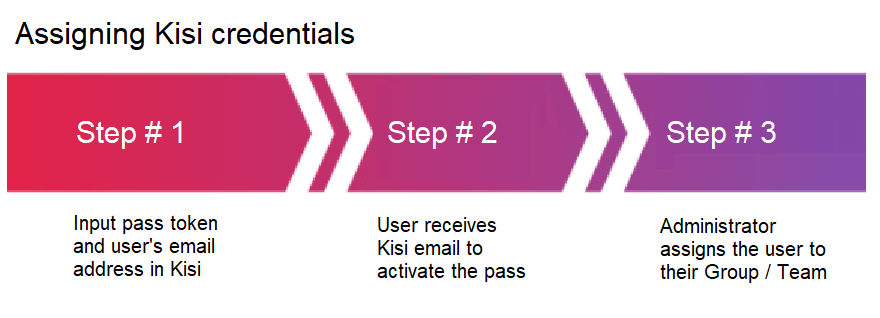
Enrolling Kisi credentials
Kisi offers different formats of physical credentials called “Kisi Passes”. Kisi Passes are available in a card, tag, or fob form. For more information on each type, please refer to our product documentation or our credentials overview.
Regardless of which Kisi Pass you choose, each comes with a token that is used in combination with the end-user email to enroll the card.
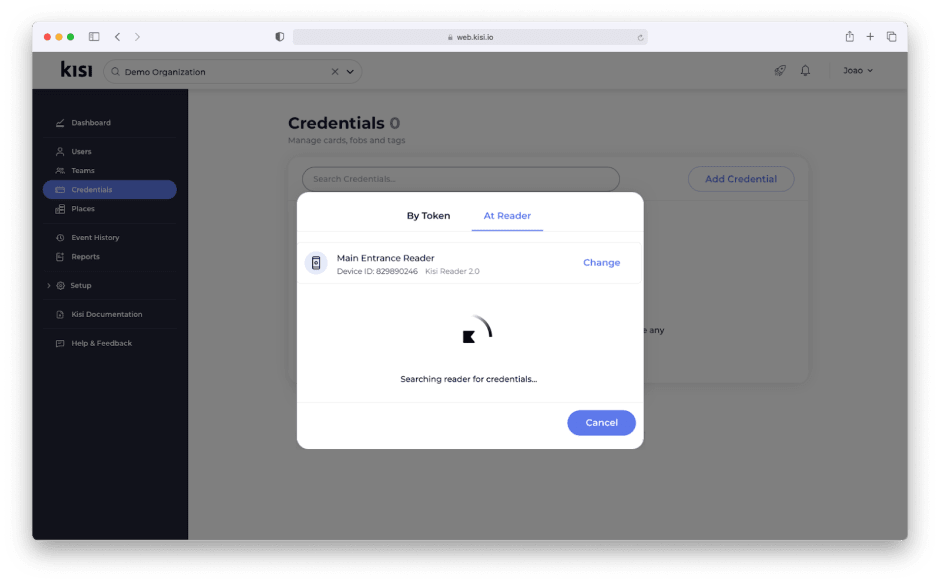
Enrolling legacy credentials
Kisi supports enrolling existing 3rd party credentials like building provided proximity or HID cards.
Legacy credentials can be enrolled directly at the reader when the reader is set to enrollment mode from the Kisi dashboard. With the reader in enrollment mode, you can scan an existing badge at the reader, receive the credentials in Kisi, and assign them to the correct user. Enrolling credentials at the reader avoids requiring the building code or any information about the card. Access to your organization can be managed in Kisi once credentials are enrolled.
Enrolling contractor / vendor credentials
Inevitably, users that are not part of your organization will require access to your space. As a best practice, it is recommended to have a few contractor badges on hand in case you quickly need them.
Since badges require an email to work, we’ve developed a simple workaround so you can easily keep your contractor badges operational:
Create an email for visitors, like “visitors@domain.com.” For each additional visitor badge you need, you can adopt the naming scheme of “visitors+1@domain.com,” “visitors+2@domain.com,” etc.
This workaround may not work in all Microsoft environments but generally avoids the need to create a new email for each vendor badge.
It is recommended the contractor users are added to a separate team or group in Kisi for a quick audit. Once the badges have been created you can mark them with colored Lanyards which have to be worn visibly so members of your organization recognize this person as a temporary member in the space.

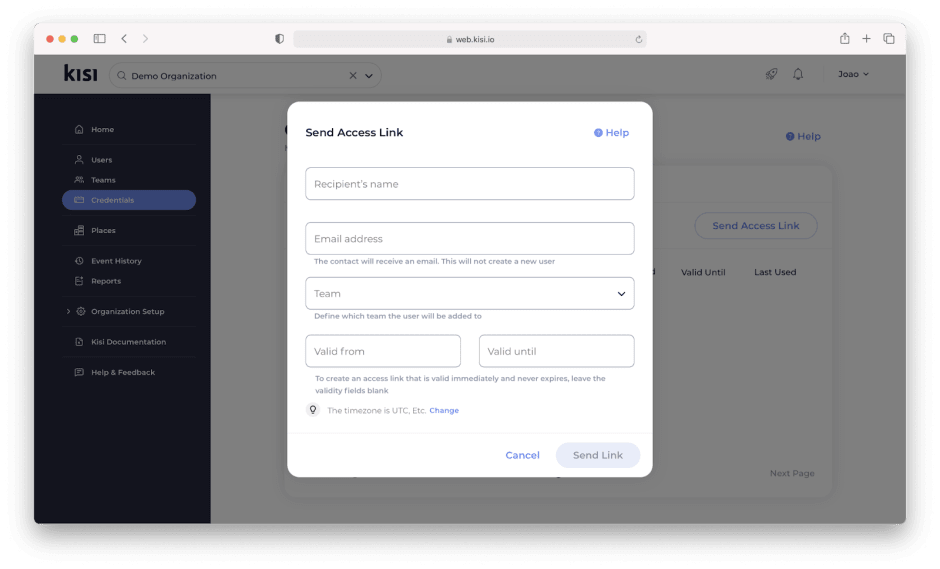
Issuing time-based unlock links
Providing short-term visitors, e.g. job applicants, clients, or vendors, with access to your space can be accomplished with self-expiring visitor links. This avoids the need to pick up a physical badge or download an app.
With an email address, the administrator can enroll the user, select their Group / Team access level, and set the validity time period. The user will receive an email with a URl that, when clicked, redirects to a mobile website that allows the user to unlock doors they have been granted access to.
Topic 3: End-User Onboarding
Creating an onboarding plan will allow new users to quickly get started with Kisi without much overhead. We recommend the following when developing an end-user onboarding process:
- Embed access control onboarding in your organization’s onboarding
- Document how users/members are expected to onboard
- Pre-share access on mobile (if you use mobile access)
- Clarify how users receive support
Embed access control onboarding in your organization’s onboarding
In most cases, end-user access control onboarding is built into the general IT or company onboarding process. As it is made a part of the overall process, it can not be forgotten when a new user joins your organization.
For several organizations, access sharing was made a part of the same workflows as creating user emails, identity profiles and / or access to other software tools.
Document how users/members are expected to onboard
Most organizations create onboarding documents specific to the software and services utilized by the organization in addition to information on how their users can access these services.
When creating access control onboarding documentation, we recommend you include the following:
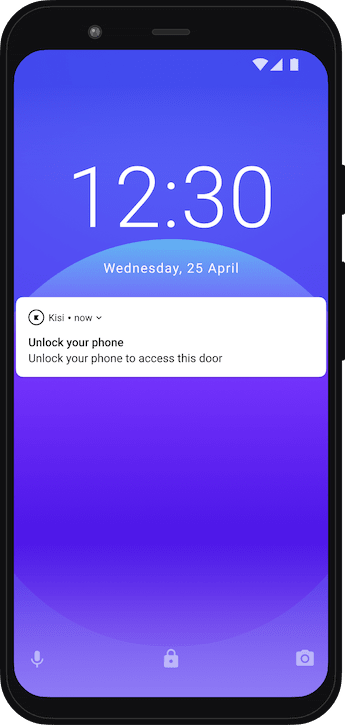
- What type of notification the user should look out for
- Minimum device requirements (mobile only)
- What to expect during onboarding
- What permissions are required (e.g. for mobile access). This will depend on your organization’s security settings in Kisi
- FAQ including possible errors or privacy questions
Pre-share access on mobile
Imagine purchasing Kisi to introduce mobile access control, but your users still use their existing badges. Make no mistake, rolling out access control is a significant undertaking and if you want your rollout to be successful we recommend pre-sharing access.
In addition to announcing Kisi’s launch before the hardware is installed, it is recommended to pre-share Kisi a week or two ahead of time. Pre-sharing mobile credentials ahead of the rollout will build excitement among your users and provide everyone with ample time to ensure everyone is set up correctly and comfortable with the mobile solution.
On the day of the rollout, users can simply pull out their phone and badge in.
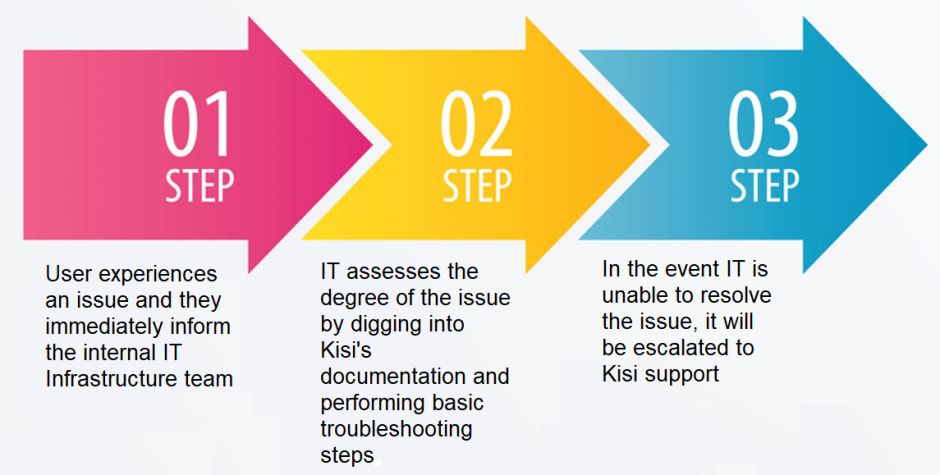
Clarify how users receive support
Understanding how to seek assistance when systems don’t work as expected is an important component to include in your onboarding training/documentation. We recommend clarifying the types of support issues a user could face and who they should contact.
Topic 4: Security Restrictions and Permissions
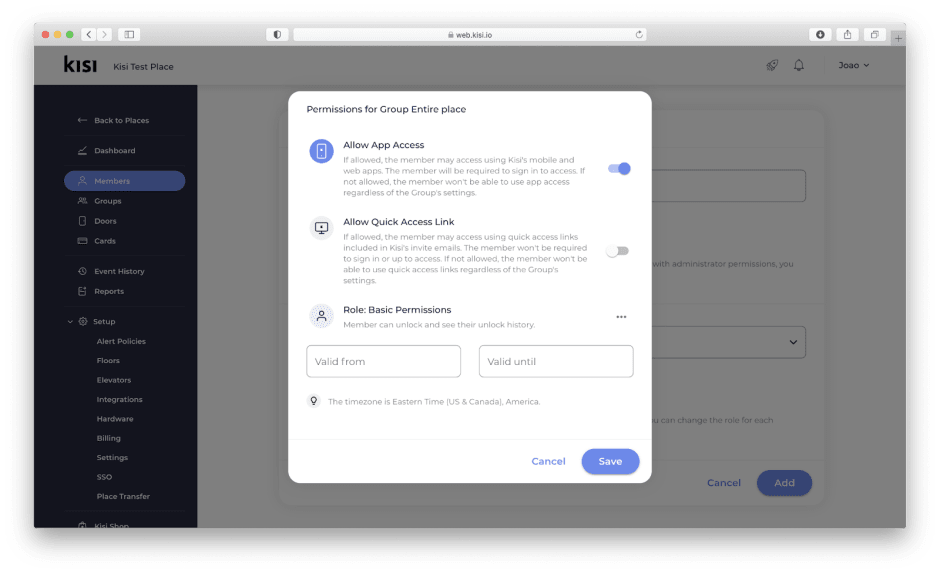
Kisi allows for permissions and security restrictions to be set at the door level or Group/Team level. In Kisi, restrictions set at the door level will take precedence over Group/Team permissions for all users, including the organization owner. Learn more about Kisi’s access control restrictions with an introductory overview.
As door level restrictions apply to all users, it is important to determine which restrictions should apply to all users and which restrictions should be team / group specific.
Geofence restriction
With geofence restriction enabled, users must physically be present at your place to perform unlocks from their device. This restriction prevents accidental unlocks from happening when a user is away from the place. This restriction can also be set at the Team/Group level.
Reader restriction
With reader restriction enabled, users must physically be within range of the Kisi reader to perform unlocks. Like geofence restriction, this prevents accidental unlocks from occurring when a user is out of range of the reader. Reader restriction has significantly higher accuracy than geofence restriction but does require that Kisi Readers are installed. This restriction can also be set at the Team / Group level.

Time restriction
With time restriction enabled, users aren’t unable to perform unlocks outside of their specified access time. Time restrictions can be useful for shift workers, custodial staff, conference rooms, etc. This restriction can also be set at the Team / Group level.

Primary device restriction
With primary device restriction enabled, users must use the enrolled device to access the space. This security measure ensures access keys can not be shared across multiple devices. If the user enrolled with their mobile device, they will need to use that device to perform unlocks.

2FA
With 2FA enabled, users are required to unlock their phones before they can perform door unlocks. Since some areas require stricter security measures, 2FA adds an additional requirement.
Scheduled unlocks
Utilizing the same parameters as time restriction, scheduled unlocks allow for doors to be unlocked based on the schedule typeset for the door. For additional security, consider configuring zone policies (also known as intrusion detection). Learn more about how to set zone policies with intrusion detection.
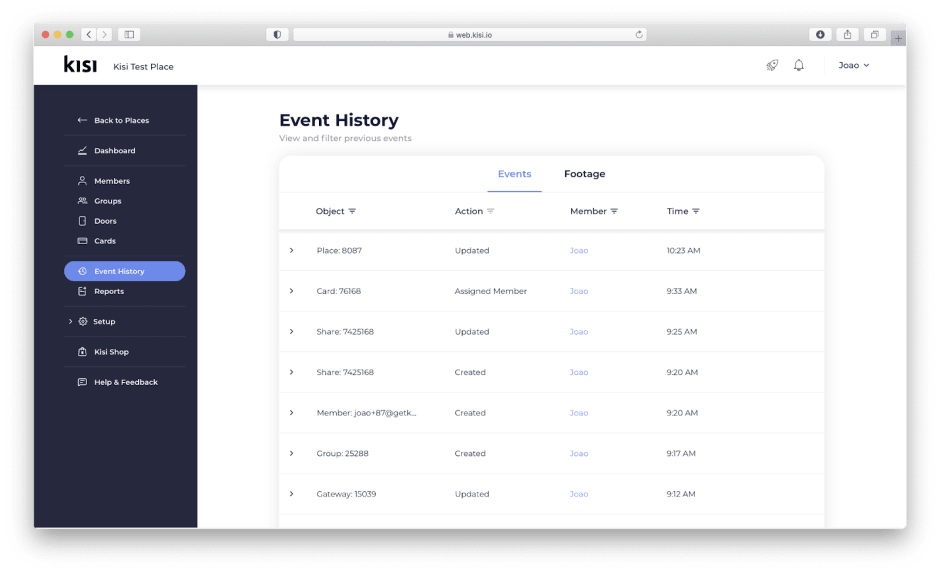
Logged admin events
Admins can access their event history to gather important details about various events that happened in their space. Advanced filters for object type, user, and time period can be employed to return more targeted results.
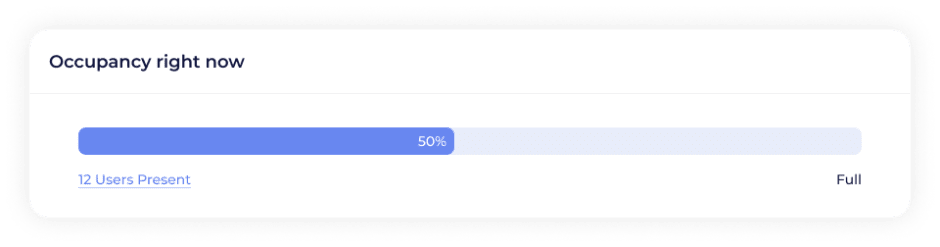
Presence reporting
Capacity management allows for real-time presence reporting. Occupancy can be determined with one reader by setting inactivity timeouts, or with two readers by tracking every entry and exit to the space. When capacity has reached 75%, 100%, and 150&, the defined alert policies will notify the members you choose.
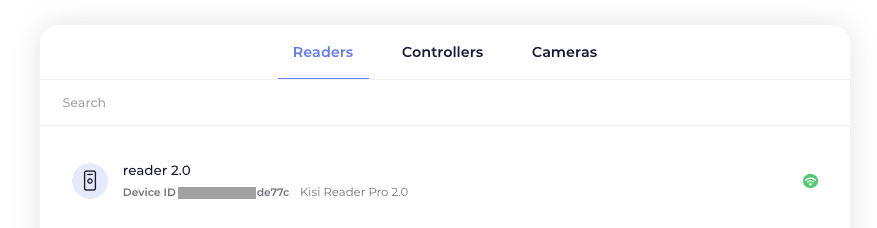
Device inventory reporting
To view the status of the connected reader, controller, or camera in your account, navigate to the hardware tab at the place level and select the desired device type. Details about the device including device name, ID, and connection status can be found for each connected device.